Introduction
There’s something genuinely satisfying about a well-finished fireplace. It anchors a room, adds warmth, and gives the whole space a sense of character. But if the surround is cracked, outdated, or just plain dull, it can drag down the look of an otherwise nice room.
Tiling around a fireplace is one of those projects that sounds harder than it actually is. Yes, it takes patience and a bit of planning, but you don’t need to be a professional to get it right. Plenty of people with zero tiling experience have done this successfully on a weekend. The difference between a good result and a frustrating one usually comes down to preparation and using the correct materials.
This guide covers everything you need to know, from picking up your supplies to putting the finishing touches on a clean, polished surround.
Why Tile Is a Smart Choice for Fireplaces
Fireplaces throw off a lot of heat, and most materials don’t handle that well over time. Paint peels, wood scorches, and some adhesives simply break down. Tile, on the other hand, is one of the few materials that actually thrives in high-heat environments. Porcelain, ceramic, and natural stone can all handle the temperature changes without cracking or warping.
Maintenance is also minimal. A quick wipe with a damp cloth and you’re done. No repainting, no refinishing. And from a purely aesthetic standpoint, tile opens up a huge range of design possibilities. Whether you want something sleek and modern or more rustic and textured, there’s a tile out there that fits.
It’s also worth mentioning that a well-tiled fireplace does tend to add to a home’s appeal. It’s one of those upgrades that people notice.
Tools and Materials You’ll Need
Getting everything together before you start is genuinely important. Running out mid-project to grab a missing tool is annoying and breaks your momentum.
Materials:
- Ceramic, porcelain, or natural stone tiles
- Heat-resistant thin-set mortar
- Heat-resistant grout
- Cement backer board
- Tile spacers
- Grout sealer
Tools:
- Notched trowel
- Tile cutter or wet saw
- Level and measuring tape
- Rubber float
- Sponge and bucket
- Painter’s tape
- Safety goggles and gloves
A quick note on the mortar: this is not the place to cut costs or substitute a regular adhesive. Standard tile adhesive isn’t designed for fireplace temperatures, and tiles bonded with the wrong product will eventually loosen. Always check that whatever you’re buying is specifically rated for high-heat use.
Step-by-Step Installation Process
Step 1: Prepare the Surface
If there’s one thing that separates a long-lasting tile job from one that fails early, it’s surface preparation. Take the time to do this properly and everything that follows gets easier.
Start by cleaning the fireplace surround thoroughly. A stiff brush handles soot, and a degreasing cleaner deals with any built-up residue. Once it’s clean, look carefully for cracks, soft spots, or areas where the existing surface feels loose. Any of those issues need fixing before you lay a single tile.
On older fireplaces especially, it often makes sense to install cement backer board over the existing surface. It creates a solid, stable base that tile adheres to reliably and reduces the chances of movement cracking your work later on.
Step 2: Plan Your Layout
Don’t skip this step. Seriously. A lot of beginners go straight to slapping mortar on the wall, and then wonder why the tile ends up looking uneven or why they’re left with awkward slivers of tile along one edge.
Lay your tiles out on the floor first in the pattern you’re planning to use. This dry run lets you visualize the finished result, figure out where cuts are needed, and adjust spacing before anything is permanent. The general approach is to start from the center of the surround and work outward, so that any cut pieces end up at the edges where they’re less prominent. Use a level to draw light reference lines on the surface to keep everything straight as you go.
Step 3: Mix and Apply the Mortar
Mix your thin-set mortar according to the instructions on the bag. The consistency you’re aiming for is something like thick peanut butter. Too runny and it won’t hold properly, too stiff and it’s difficult to work with.
Spread it onto the surface using a notched trowel held at about a 45-degree angle. Work in small sections of two to three square feet at a time rather than trying to cover everything at once. Mortar starts to skin over and lose its bonding ability fairly quickly, so keeping your sections manageable gives you more control and better results.
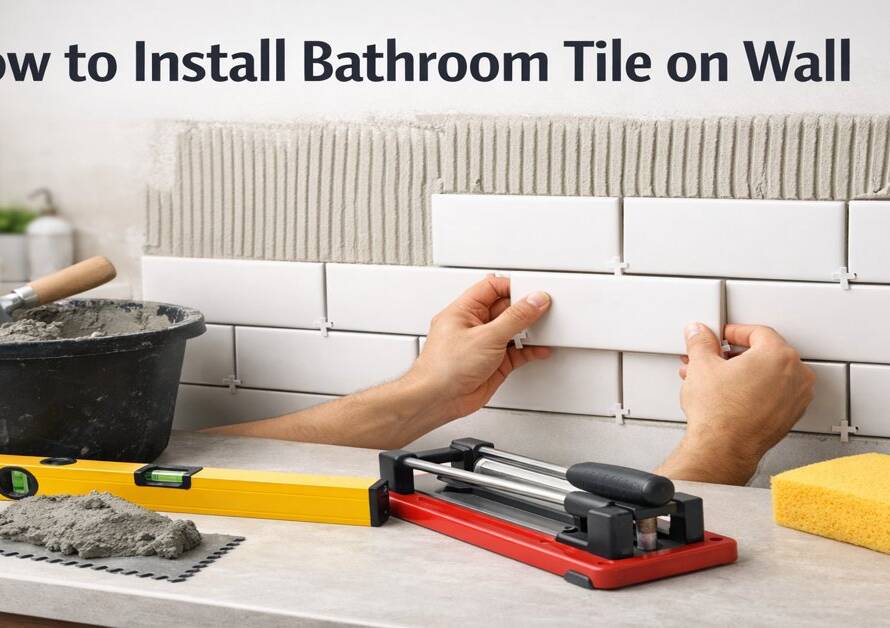
Step 4: Set the Tiles
Press each tile firmly into the mortar with a slight twisting motion. That small twist helps the tile seat properly and pushes out any air trapped underneath. Place spacers at each corner as you go to keep your gaps consistent throughout.
Every few tiles, use your level to check that everything is sitting flat. Small adjustments are easy to make now and nearly impossible once the mortar sets. Work steadily across the surface, keeping your reference lines in view the whole time.
Step 5: Cut Tiles for Corners and Edges
Cutting is where a lot of beginners feel nervous, but it’s really not as difficult as it looks. The most important thing is accurate measuring. Mark your tile carefully, double-check the measurement, and then make your cut.
A wet saw gives you the cleanest results and is absolutely worth renting if you don’t already own one. A manual tile cutter works fine for simple straight cuts on thinner tiles. After cutting, run your fingertip along the edge. If it feels rough or sharp, smooth it down with a tile file before installation.
Step 6: Let the Mortar Cure
All your tiles are in place and it’s tempting to keep moving, but this is where you need to slow down. The mortar needs a full 24 hours to cure, possibly longer if the room is cool or humid. Don’t lean on the tiles, press them, or apply any weight to the surface during this time.
Rushing this stage is one of the most common mistakes in DIY tiling. Tiles that haven’t been allowed to cure properly can shift when you start grouting, and that undoes all the careful alignment work you did earlier.
Step 7: Apply the Grout
Pull out all the tile spacers before you start. Mix your heat-resistant grout to the consistency described on the packaging, then use a rubber float to press it firmly into the joints. Hold the float at an angle and work diagonally across the tiles rather than straight along the joints. That diagonal motion pushes the grout deeper into the gaps and gives you a better fill.
Once you’ve covered a section, take a damp sponge and wipe the excess off the tile faces. Rinse and wring out the sponge regularly. You’re only removing grout from the surface of the tiles, not from the joints themselves. Let it firm up for 20 to 30 minutes, then go over everything again with a clean, barely damp sponge.
Step 8: Clean Up and Seal
After the grout dries, you’ll likely notice a light hazy film on the tile surface. That’s completely normal. Buff it away with a dry soft cloth. If it’s stubborn, a slightly damp cloth usually sorts it out.
Then seal the grout. Use a small brush to apply the sealer directly into the grout lines, wipe any excess off the tile faces, and let it dry fully before you use the fireplace. Sealing protects the grout from staining and moisture and significantly extends how long your work stays looking good.
Safety Tips to Keep in Mind
A few things are worth being careful about when working around a fireplace. Make sure it’s been completely cold for at least 24 hours before you start. Only use materials that are rated for high-temperature environments. When cutting tile, wear safety goggles and gloves because the edges and fragments can be sharper than they look. And before you begin the project, check your local building codes. Some areas have specific requirements around clearance distances between tile work and the firebox opening.
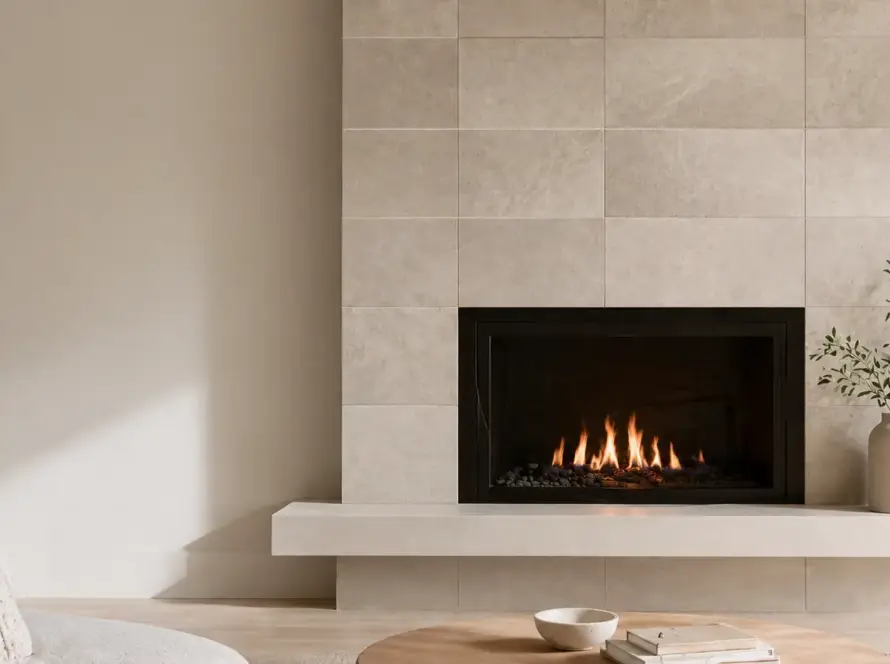
Design Tips Worth Considering
Larger tiles tend to create a more modern, open look. Smaller mosaic tiles add texture and detail and work well in more traditional spaces. If you want the individual tiles to really stand out, choose a grout color that contrasts with them. If you’d rather the surface look more seamless, match the grout closely to the tile color. Either way, lay out the full design on the floor before you commit. What looks good in your head doesn’t always translate the way you expect.
Conclusion
Installing fireplace tile is genuinely one of the more rewarding DIY projects you can take on. The finished result looks like something a professional did, and the process itself isn’t beyond a complete beginner as long as you take each step seriously. Prepare the surface properly, plan your layout before you commit to anything, use the right materials, and give things time to dry. Do those four things and you’ll end up with a fireplace surround that looks great and holds up for years.
If you are planning a renovation and need expert assistance for fireplace tile installation in Las Vegas, Getz Tiles can help ensure safe, clean, and long-lasting results.
Frequently Asked Questions
- What type of tiles work best for a fireplace?
Ceramic, porcelain, and natural stone are all great options for fireplaces. The team at Getz Tiles will help you pick a material that suits your style, handles heat well, and fits your budget.
- How long does fireplace tile installation take?
Most fireplace tile projects are completed within one to two days. Getz Tiles works efficiently without cutting corners, so your home gets the care and attention it deserves throughout the process.
- Can you remove old fireplace tile or brick before installing new tile?
Absolutely. Getz Tiles handles the full process, including removing the existing tile or brick, prepping the surface properly, and cleaning up once the job is done. You won’t have to deal with any of the mess.
- Do you serve all areas across Las Vegas?
Yes. Getz Tiles works across the entire Las Vegas area. Whether you’re close to the city center or further out, they’re ready to come to you and get your fireplace looking exactly the way you want it.